|
|
|
|
Contact:
![zenseeker [at] hotmail [dot] com](EmailImage.gif)
Basic SideBurner Alcohol Stove
Advantages -
Doesn't require a pot stand.
Works.
Easy to find parts.
Can light without primer pan.
Drawbacks -
Sideburner design not ideal for narrow pots.
Primer pan needed for easy lighting of stove (but not required).
Very difficult to simmer (requires pot stand and stove may fire up without warning to full output with poor simmer adapter).
Pot may slide on stove.
Pot can easily tip over if not using a good pot stand.
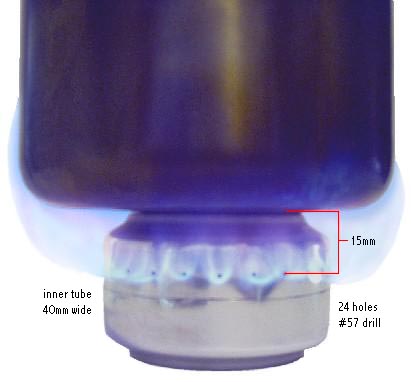
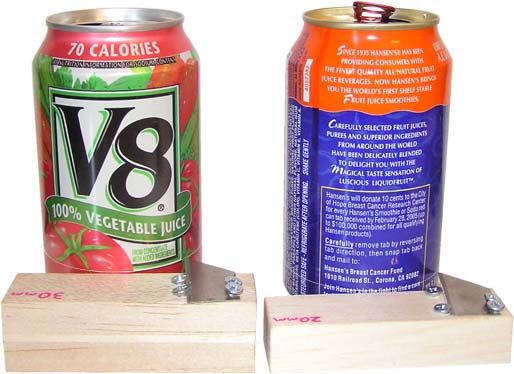
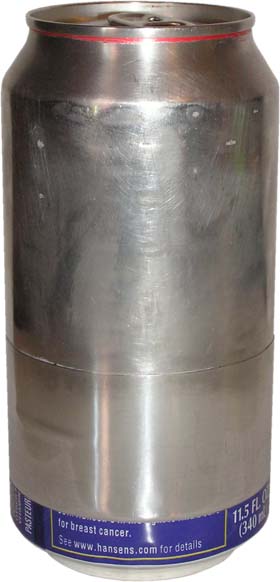
This simple alcohol stove (similar to the Tin Man's New Link) burns denatured alcohol (ethanol), HEET (methanol), and rubbing alcohol (isopropanol) and is constructed so that a pot stand is not necessary.
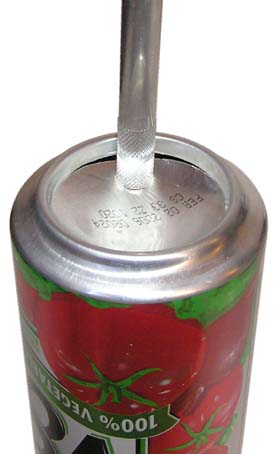
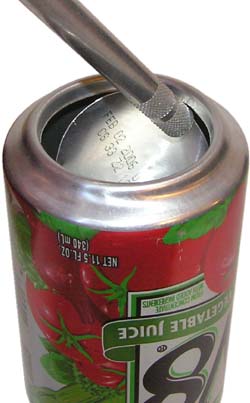
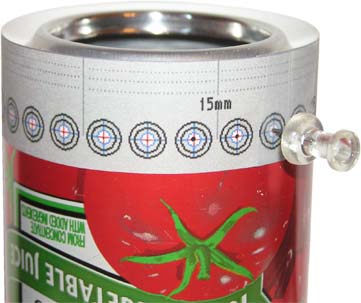
This stove is made from two 12oz pop cans. Twenty-four jets were drilled through the side of the stove, 15mm from the top, with a #57 drill. The bottom section of stove is 20mm tall. The top piece is about 30mm tall and the inner cylinder is 40mm wide.
Simmering is possible (you will need a pot stand, stakes, rocks, etc. to suspend pot 1 inch over stove) but can be difficult, since the side jets will fire up with full force once the stove reaches a certain temperature. You must first ensure that the stove has cooled down enough that the side jets don't fire up after you light the stove with simmer attachment. You then may safely place a cutout 12oz pop can bottom with a hole cut in it (or something similar) on top of the stove.
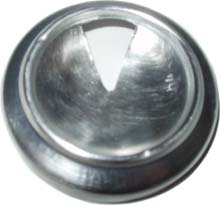
Simmer attachment
This is just one of many DIY alcohol stove options. For more information on different options visit Zen and the Art of the Alcohol Stove and the Templates page.
Construction
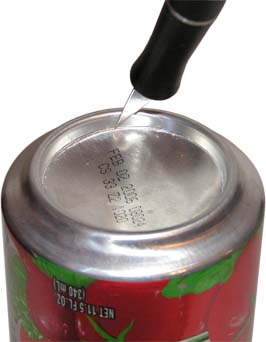
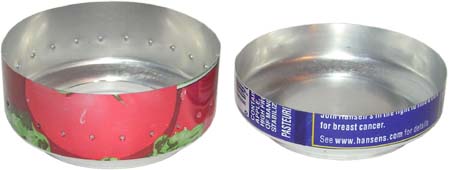
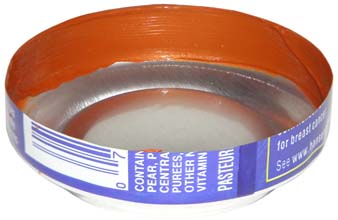
Start by scoring a circular line around the inside rim on the bottom of an empty can (as shown above). Go around and around a couple of times until it's well scored.
If you are good with your hands and a hobby knife, you can cheat and poke a tiny starter hole. If you aren't good with your hands and a hobby knife, this technique will lead to damaging your can or a self inflicted flesh wound.
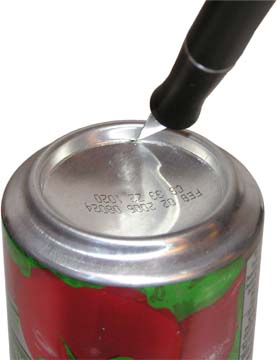
Press the back of a knife handle into your scored line to start a tear.
Pop out the top and beware of the razor sharp ragged edge in your can. An SOS pad can be used to smooth out any dangerous edges.
Print out a template, tape it together and place it on the can you just modified.
Use a pushpin to make your jets as shown above.
Alternately you can use a #80 drill for a guide hole followed by a #57 drill for cleaner jets.
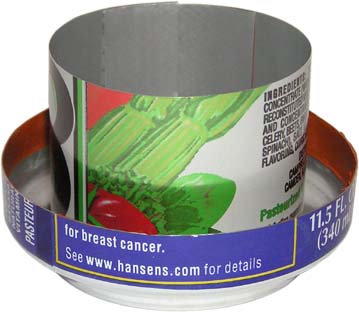
Mark a circumferential line 30mm from the bottom of the can you are working on and 20mm from the bottom of a second empty can.
Use scissors and trim down to your circumferential marks.
Polishing the edges with an SOS pad will aid in assembly and decrease the chance of skin lacerations later on.
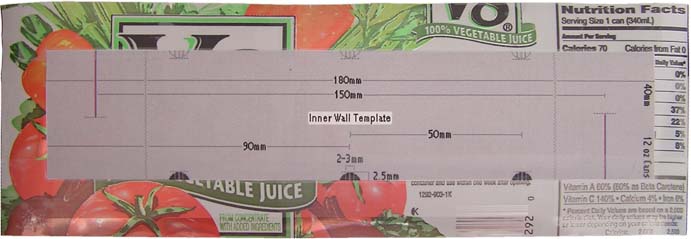
Print out a 40mm inner wall template and tape it to a section from the side of a 12oz beverage can.
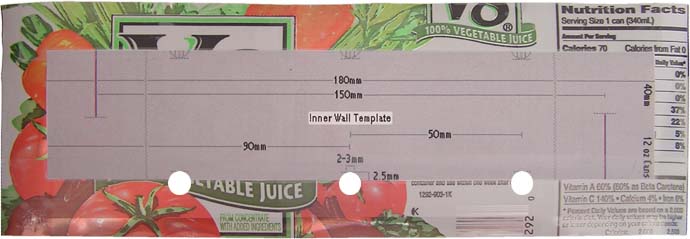
Use a hole punch to punch out the three bottom weep holes.
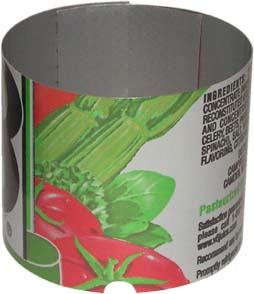
Cut your side slits, trim your inner wall, and lock the slits together to form a cylinder as shown above.
↓ ↓
↓
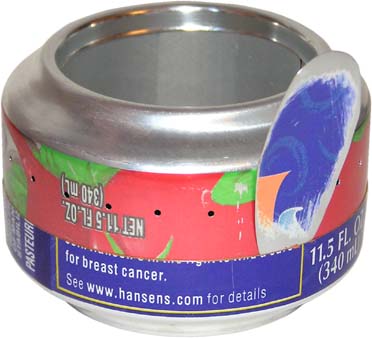
Press a Dilator Tool into your 20mm bottom section. This should enlarge your 20mm section so that it can slip over your 30mmm section.
Perform a test fit to ensure the 20mm section slide fit over the 30mm section. If it doesn't, repeat using the Dilator Tool until it does.
Note: an unopened can of the same size as your section to be stretched can be used in lieu of a Dilator Tool, but you may need to really work it by repeatedly pressing it into the bottom section at less than perpendicular angles. You are more likely to buckle the sidewall of the top section during assembly if you choose to just use an unaltered unopened can.
Smear some high temperature RTV silicone or JB Weld on the inner wall of your 20mm section.
Set your inner wall in your 20mm section.
Carefully fit your 30mm section into your 20mm section.
You may need to use a shim (shown above) to get it to fit. Just take your time to avoid damaging your stove.
To make a shim, cut out a section of aluminum from a beverage can, round off edges with scissors and polish these edges smooth with an SOS pad and/or metal polish. Smooth edges are important if you wish to avoid damaging your can sections.
Press it all together, set a heavy book on it and let the silicone vulcanize overnight before testing your stove.
