|
|
|
|
Contact:
![zenseeker [at] hotmail [dot] com](EmailImage.gif)
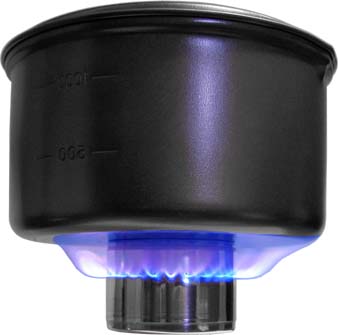
This stove has an open center fuel port that allows for preheating but may instead be made into a pressurized stove with about the same amount of effort. Pots, 24oz Heineken Can-Pots, and 12oz pop Can-Pots may be placed directly on top of stove. Acceptable fuels are denatured alcohol and methanol (yellow HEET).
This stove is made of 3oz aluminum food cans which are much thicker than U.S. pop cans and is thus considerably sturdier than stoves made of pop cans. It is also heavier than a regular pop can stove but still weighs less than an ounce.
This is actually a difficult stove to make and is not recommended for your first stove project. If you are considering building this stove, take a look at the Simplified Zen Sideburner Stove for a much easier to construct version of this stove.
Advantages -
Well sealed. You shouldn't have any leaks if constructed properly (especially if you use high performance ceramic industrial cement).
Very sturdy. Much stronger than stoves made from pop cans.
Wider base and more stable than stoves made from 12oz and 6oz cans.
Doesn't require a pot stand.
Works.
Able to use with 24oz Can-Pots (Heineken).
Easy to find parts.
Can light without primer pan.
Drawbacks -
Difficult to construct.
Sideburner design not ideal for narrow pots.
Primer pan needed for easy lighting of stove (but not required).
Can't simmer.
Components-
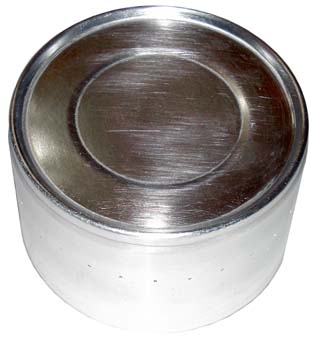
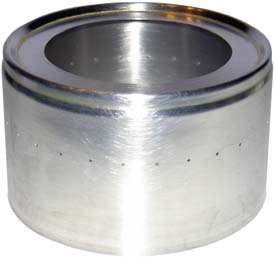
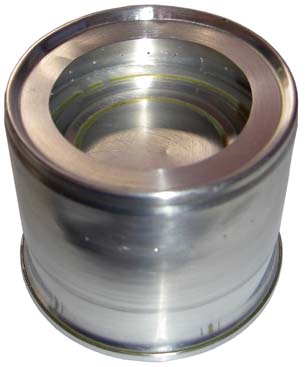
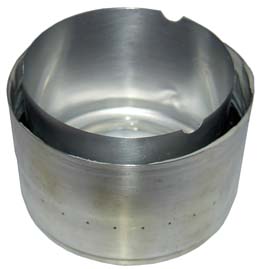
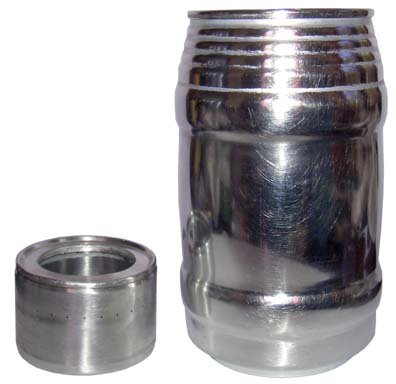
Top - 3oz Spam spread can (used because the bottom fits nicely into the bottom of a 24oz Heineken can) with top rim cut off (score the bottom edge of rim and cut with good scissors). The inside protective coating was completely removed with an SOS pad. It was forced over an empty 3oz cat food can and heated and cooled until it could be slid off the cat food can without much effort (permanently stretching the top). Twenty-eight jets were drilled with a #71 drill 15mm from bottom using a template. The top center fuel port hole was made by marking a 44mm wide circle with a template, followed by cutting a starter hole with a hobby knife and grinding smoothly up to the 44mm mark.
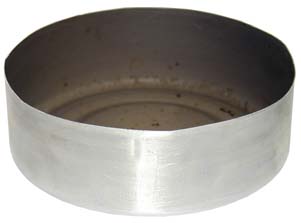
Bottom - 3oz cat food can trimmed 20mm from bottom of can. Can should be cut with good scissors instead of scoring and tearing to avoid disfiguring your bottom. The inside protective coating was completely removed with an SOS pad.
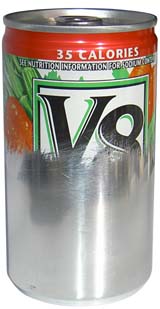
Inside Wall - About 39mm of the bottom of a V8 can with the center depression cut out. Three evenly spaced weep holes were punched in the side wall edge. What was the bottom edge of the V8 can was roughened with sand paper and glued centered to the inside of the top section. The top section was slid over the bottom section and sealed with high temperature adhesive.
Optional Primer Plate - trimmed down 6oz cat food can may be used for a primer pan and alleviates the need to wait for the stove to heat up before placing your pot on it.
Optional Heineken Can Pot - empty a 24oz can of Heineken and use a hand powered rotary can opener to remove the top.
Options
This design may be easily converted to a pressurized stove version by installing a treaded rivet or nut to the center of the V8 can in lieu of removing the center depression. If you choose to do this, you may want to drill 48 holes with a #71 drill 10mm from the top (or something similar) of the inner wall to prevent the pressurization of the inner chamber from forcing liquid alcohol out the sides of your heated stove, causing a small fireball.
A low quality, and far easier to construct, version of this design can be made by cutting a 25-45mm hole in the bottom of an unopened 3oz Spam Spread can, removing the contents, drilling your side jets and using a primer pan. This stove will work ok if you get a good seal between your pot and stove. See Simplified Zen Sideburner Stove for details.
Note - This is just one of many the DIY alcohol stove options. For more information on different options visit Zen and the Art of the Alcohol Stove and the Templates page.
Making the Stove
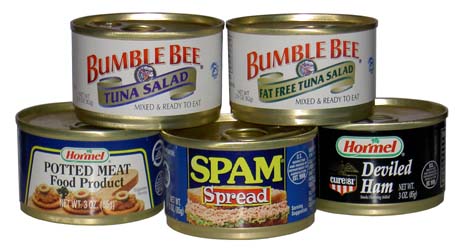
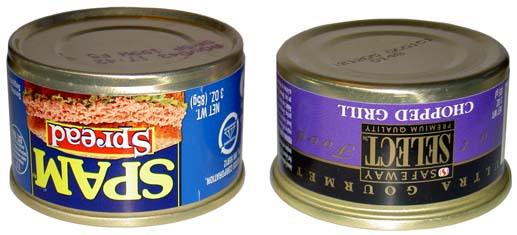
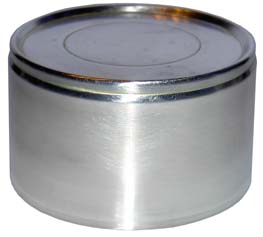
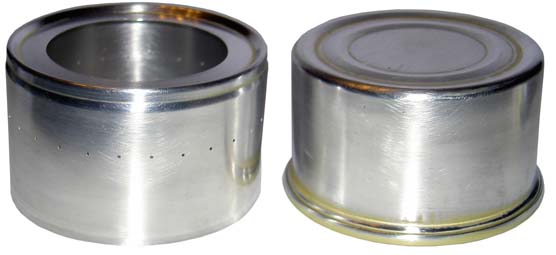
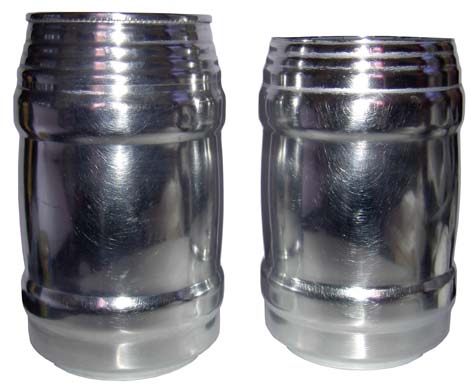
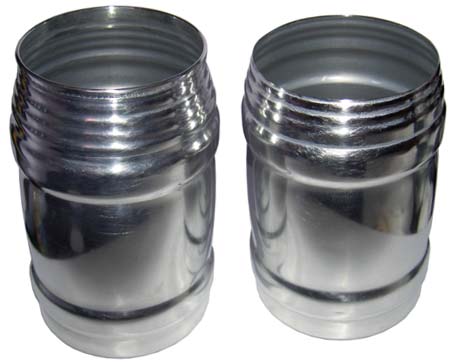
The top half of the stove is made from a 3oz Hormel (Spam Spread, Deviled Ham and Potted Meat) or Bumble Bee (Tuna Salad and Fat Free Tuna Salad) can. Regular Bumble Bee Tuna and White Albacore cans look similar but won't work.
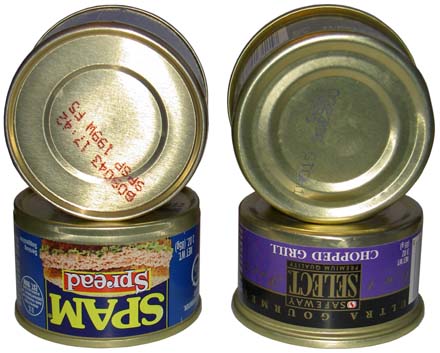
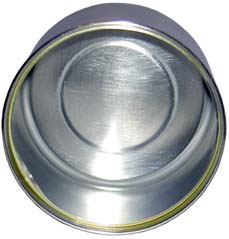
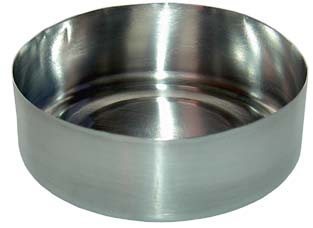
The shape of the bottom of Hormel and Bumble Bee cans (cans on left) allow a 24oz Heineken or Fosters Beer can to fit right on it. This feature allows you to use a Heineken or Fosters can as a 24oz pot. Other cans (cans on right) share the same diameter but have rounded bottoms and don't allow for the use of Heineken and Fosters cans to be securely placed on them as pots.
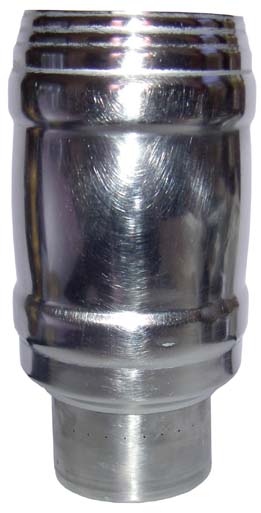
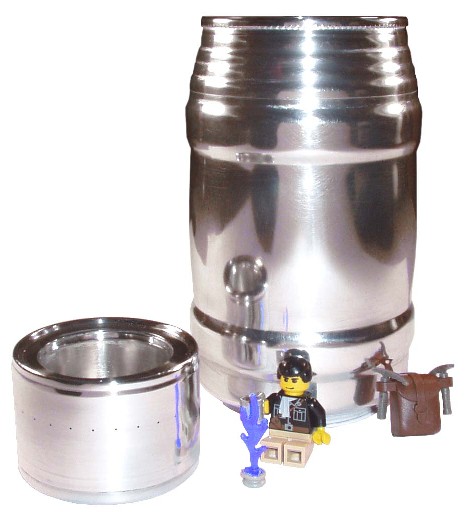
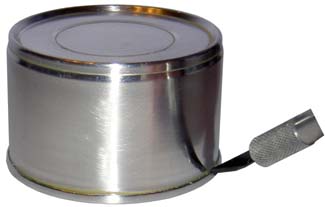
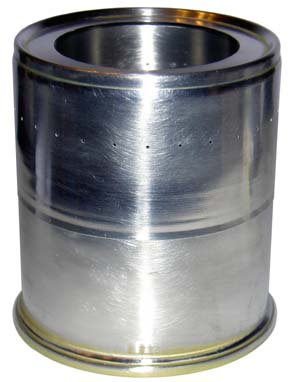
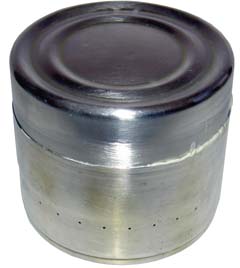
Here is a trimmed down Heineken can sitting on a completed Zen Stove.
Other aluminum 3oz cans (cat food cans, canned fragrance, etc.) can be used for the bottom of the stove. If you don't wish to use a Heineken or Fosters can as a pot you can substitute a different 3oz can for the top.

First remove the label and clean off any glue.
Optionally, you can use an SOS pad of sandpaper to remove as much of the inner coating as possible. This will allow for a better seal and eliminate the release of toxic gases when you heat your stove.
Use a hobby knife to score the border of the side of the can and the rim. This will create a nice straight line that will be the bottom of the top half of the stove.
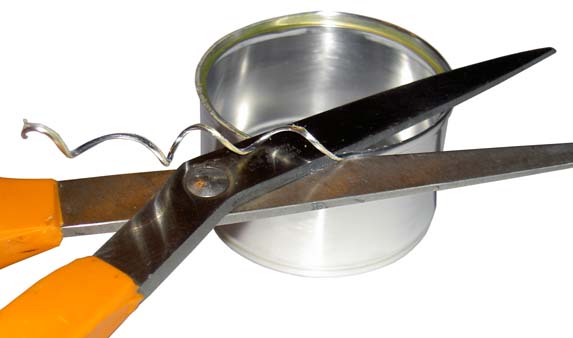
Use a good pair of scissors to trim off the rim. Carefully cut about center of the rim's lip.
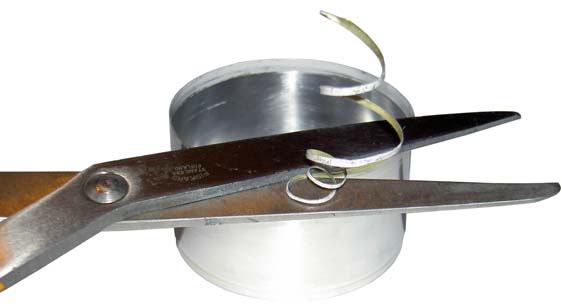
Carefully cut along the score-line to make a smooth even bottom.
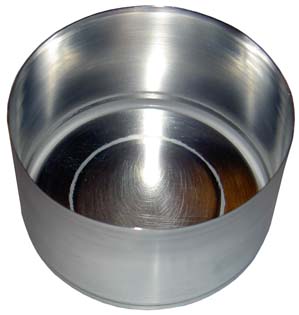
Use sandpaper or an SOS pad to smooth out the edge of your can.
Set your can bottom down.
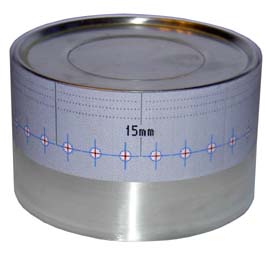
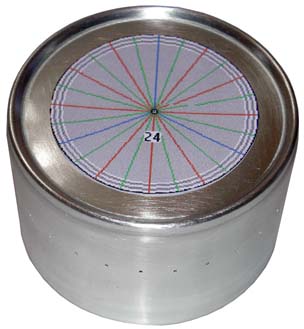
Cut out the Side-Burner template for Spam cans and tape it to the side of your can.
Note: Two templates are provided, one for needle sized holes (#71) and one for pushpin sized holes (#57).
The pushpin sized jets seem to be a bit more reliable than the smaller needle sized jets, especially for wet weather conditions or with poor quality fuel.
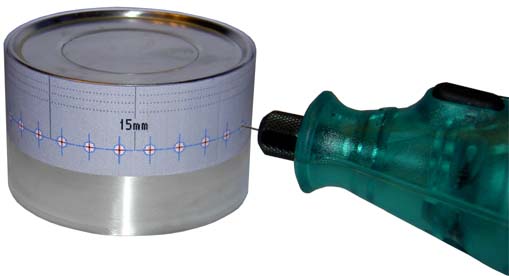
Use a #80 drill with a pin-vise or a Dremel to drill out the guide holes for the jets (or you can go straight to a #71 or #57drill if you aren't a perfectionist).
A number 8 needle can be substituted for the # 71 drill and a pushpin can be substituted for the #57drill.
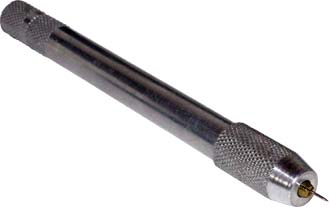
PinVise
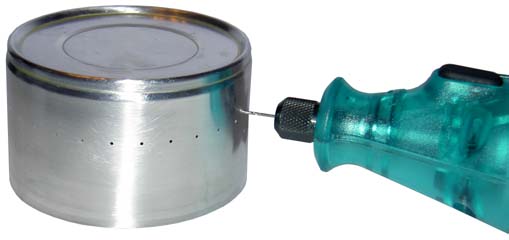
Use a #71 or # 57 drill to redrill the jet holes.
You will now need to cut out the fuel inlet port. A knife can be used to score around and around the edge of the center depression until it pops out. See Simplified Zen Stove for details.
A larger hole can be made by centering a 44mm circle template on top of the stove. Use a piece of rolled up tape to hold the template on the stove.

Use a knife to carefully score around the template to mark the edge of the fuel inlet hole.
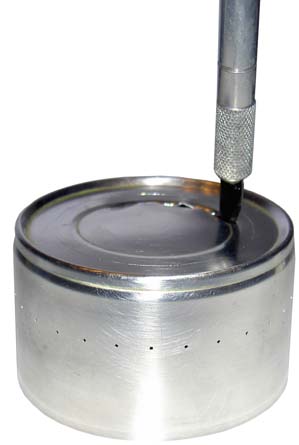
Puncture the top of the can with a knife well within the edge of your score line. This technique will leave a ragged edge.
Use a file and/or a grinding wheel to enlarge and smooth out the hole to the score-line.
Use sandpaper or an SOS pad to smooth out any rough edges.
Now it's time to fit the top and bottom pieces. You can use a generic 3oz cat food can for the bottom if you would like to save a few pennies.
Remove the label from the can that will be the bottom portion of the stove and remove any glue.
Place the top part over the bottom of the other can.
Flip the assembly over and evenly press the bottom can into the top can.
Try to get the edge of the bottom can to about the level of the jet holes of the top can.
Now open the bottom of the bottom can and remove the contents. Wash out any residue.
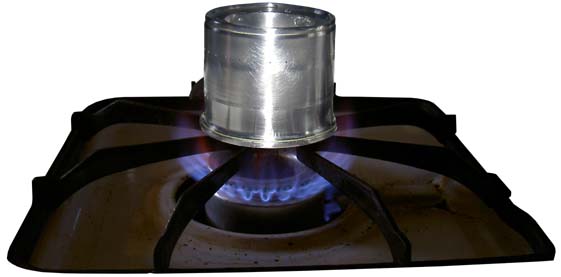
Set the assembly bottom down on top of a gas burner. Heat until you see or smell smoke. Without burning yourself, place the assembly in your sink and pour cold water over it. Carefully pull and separate the two parts. If you can't, repeat this step until the two part come apart. Heating the parts will permanently stretch the top portion and compress the bottom portion so that they will slide very tightly over one another.
This step can be difficult and you should take your time to ease the two pieces apart one millimeter at a time, while moving around the perimeter of the top can. Rubber gloves might aid in grabbing the pieces.

Mark the bottom part of the stove 20mm from the top. One method is to use a block of wood (one 1/2" and two 1/8" balsa blocks screwed together) with a blade affixed to the top of it to score a nice even line.
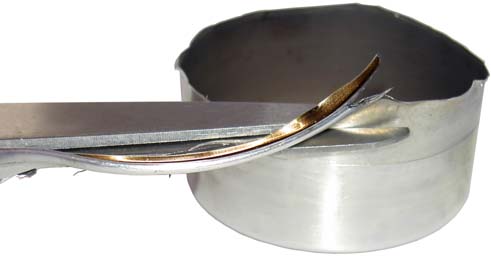
Trim off the rim from the bottom stove part.
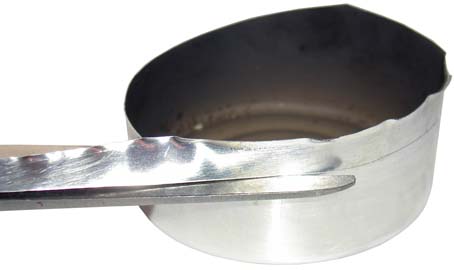
Use a good pair of scissors to cut down to and then along the score-line to make a nice even edge.
Use sandpaper or an SOS pad to smooth out the edge. Optionally, you can remove the inner coating of the can with sandpaper or an SOS pad to prevent it from burning off later and releasing toxic fumes.
Now it's time to work on the inner wall made from a 6oz juice can. If you wish to remove the color coating on your 6oz can, it's easier to do so before you open your can.

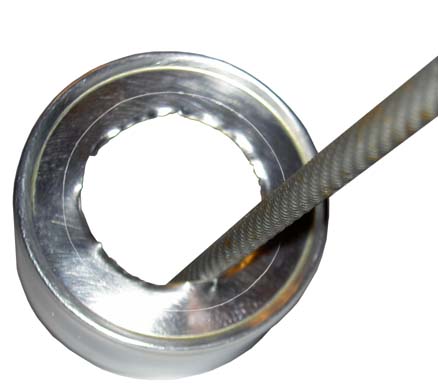
Empty the contents of your 6oz can and use a knife to score around and around the edge of the inner depression. Keep going until the tip of your blade begins to pop through. You can cheat by poking just the tip of the blade thru to get the tear started.
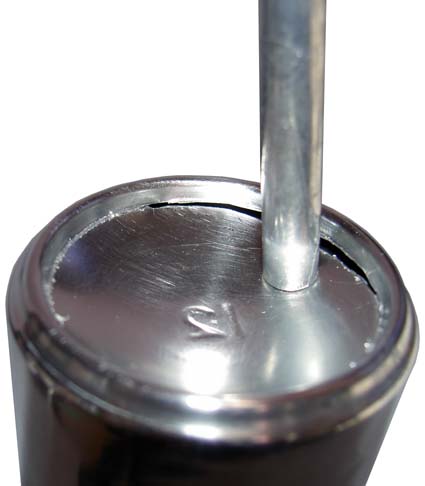
Once you break through with your blade, use the back of your knife or your thumb to create a controled tear along the score-line.
Next we will need to mark the 6oz can 39mm from the bottom. One method is to stack 3 half inch blocks of balsa wood, attach a blade to it and use it to score around the can.

Use a good pair of scissors to cut down to the score-line and along it or if you have a good scoring device, keep scoring it until you are able to split the can in half.

Use sandpaper or an SOS pad to smooth out the edges of your 6oz can. If you have the time, remove the coating on the inner wall to prevent it from burning off later on.
Tape the inner wall template for Spam cans around your 6oz can.

Use a hole punch to punch out the three bottom weep holes.
Optionally, use sandpaper to roughen up:
|
Apply JB Weld, High Temp RTV, or some other high temperature adhesive (temperature rating greater than 600°F) to the:
|
I've had good results with High Temperature RTV silicone (autoparts store) and Autostic (2,285°F rating).
Center the inner wall can into the top half of the stove.
Carefully fit the bottom half of the stove into the top half and evenly press it in until it is seated nice and snuggly.
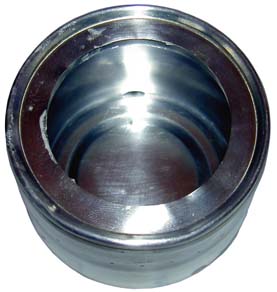
Make sure that the inner wall is centered and clean off any exposed adhesive.

Let your stove set for 24 hour before testing.
Making the Pot
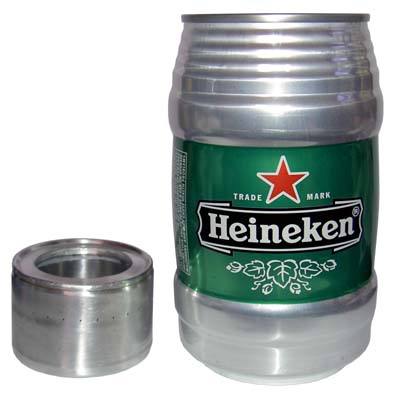
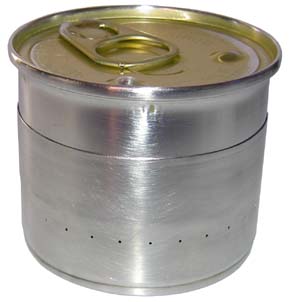
Heineken 24oz cans make very lightweight canpots if you are willing to hike with something that needs a lot of babying. This pot/stove combination is less than ideal, as much of the heat from the stoves will go up the side of the pot, but these stoves do fit nicely in the Heineken "pot" and make for a compact setup.
If you want the shiny silver look, use sandpaper or an SOS pad to remove any outer coating from the can before opening it. Once you get it nice and clean, empty the contents of the can.
Either use a rotary can opener (note, some can openers will damage the can) to remove the top lid (left can-pot), or use a good pair of scissors to trim down to your desired height (right can-pot).
If you leave the rim intact (left can-pot), the pot will be more rigid and easier to lift when hot.
