|
|
|
|
Contact:
![zenseeker [at] hotmail [dot] com](EmailImage.gif)
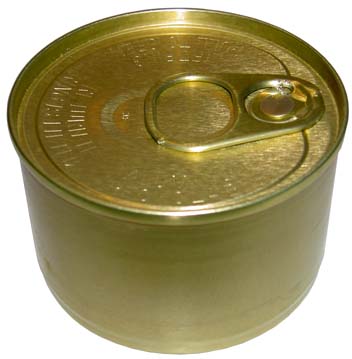
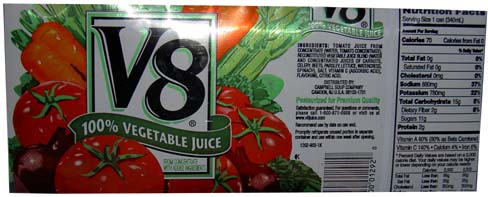
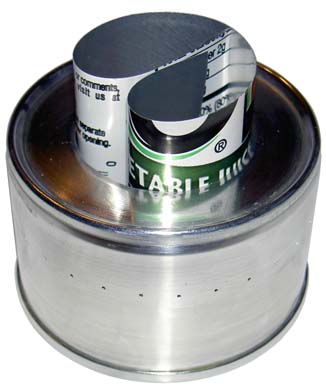
Simplified Zen Alcohol Sideburner Stove
Like the regular Zen Sideburner Stove, this stove can be used with Pots, 24oz Heineken Can-Pots, and 12oz pop Can-Pots. It is much simpler to build than a Zen Stove, but requires a primer pan and will not work if there isn't a good seal between the stove and your pot (some pots have uneven bottoms). This stove is also glue-less, so one does not need to worry about adhesive failure from extended use/abuse. Acceptable fuels are denatured alcohol and methanol (yellow HEET).
This stove is made of 3oz aluminum food cans which are much thicker than U.S. pop cans and is thus considerably sturdier than stoves made of pop cans. It is also heavier than a regular pop can stove but still weighs less than an ounce.
Advantages -
Easy to construct.
Sturdier than stoves made from pop cans.
Wider base and more stable than stoves made from 12oz and 6oz cans.
Doesn't require a pot stand.
Works.
Able to use with 24oz Can-Pots (Heineken).
Easy to find parts.
Drawbacks -
Not sealed. If you have a poor fit between the pot and stove, the stove will not work (unless you add an inner wall).
Sideburner design not ideal for narrow pots.
Can't simmer.
Can't light without primer pan (unless you add an inner wall).
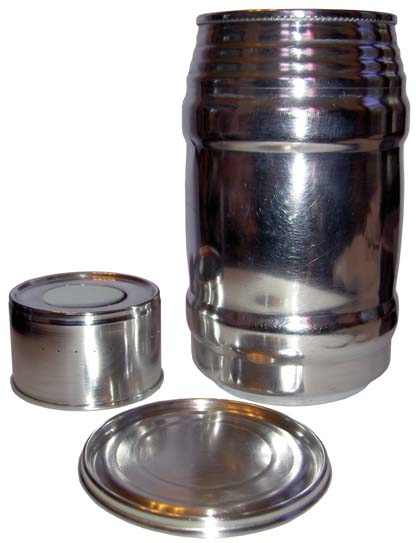
Minimal Components-
1 x 3oz Hormel food can (Spam Spread, Potted Meat, Deviled Ham)
1 x larger can for a primer pan
1 x needle or pin for jet holes
1 x knife of fuel port hole and trimming down primer pan and Heineken can
1 x 24oz Heineken can or pot
Components-
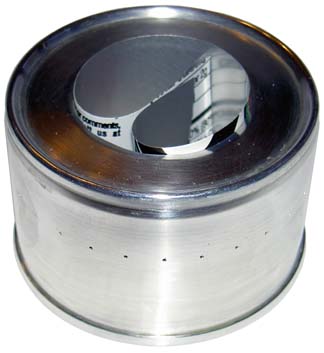
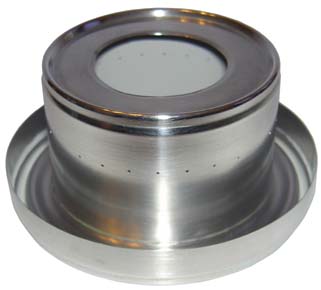
Top - 3oz Spam spread can (used because the bottom fits nicely into the bottom of a 24oz Heineken can). Twenty-eight jets were drilled with a #71 drill 15mm from bottom using a template.
Required Primer Plate - trimmed down 6oz cat food can may be used for a primer pan.
Optional Heineken Can Pot - empty a 24oz can of Heineken and use a hand powered rotary can opener to remove the top.
Options
If you are crafty, you can build an inner wall and slip it in the stove thru the fuel port. The inner wall allows you to prime and operate the stove without a primer pan or tight pot/stove interface.
Note - This is just one of many DIY alcohol stove options. For more information on different options visit Zen and the Art of the Alcohol Stove and the Templates page.
Making the Stove
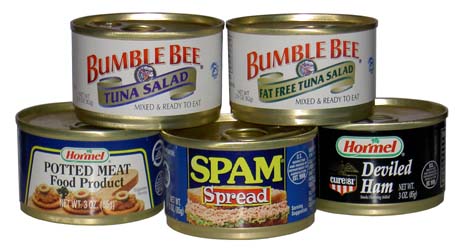
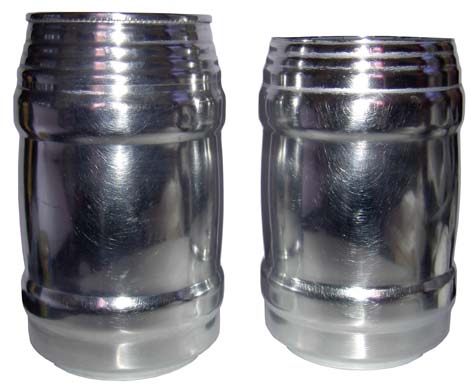
The top half of the stove is made from a 3oz Hormel (Spam Spread, Deviled Ham and Potted Meat) or Bumble Bee (Tuna Salad and Fat Free Tuna Salad) can. Regular Bumble Bee Tuna and White Albacore cans look similar but won't work.
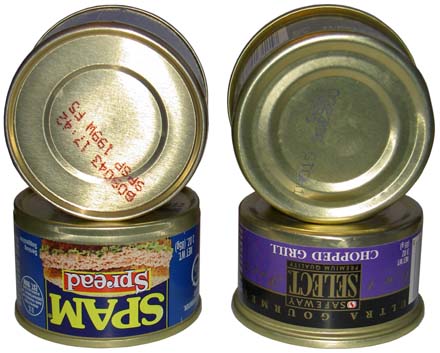
The shape of the bottom of Hormel and Bumble Bee cans (cans on left) allow a 24oz Heineken or Fosters Beer can to fit right on it. This feature allows you to use a Heineken or Fosters can as a 24oz pot. Other cans (cans on right) share the same diameter but have rounded bottoms and don't allow for the use of Heineken and Fosters cans to be securely placed on them as pots. The flat surface of the bottom of the Hormel and Bumble Bee cans are also better suited for the optional inner wall.

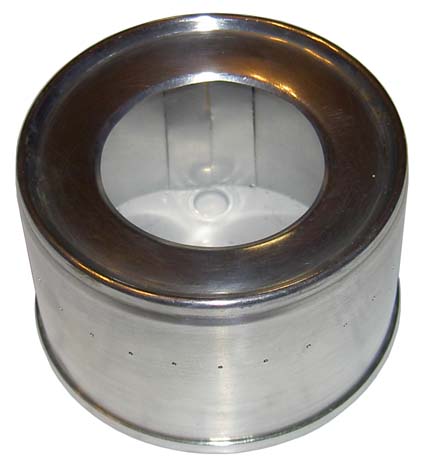
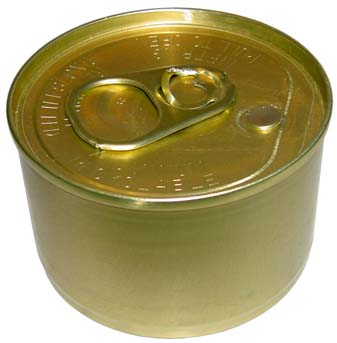
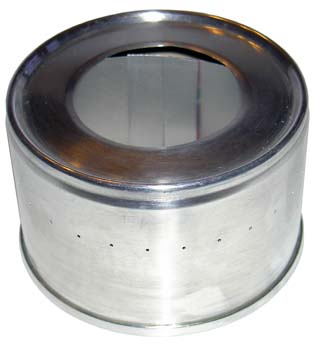
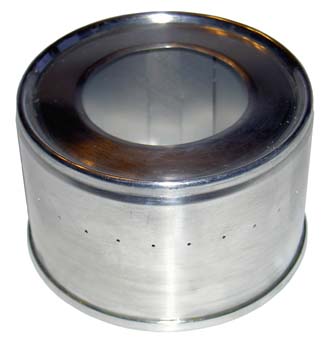
Here is a trimmed down Heineken can sitting on a Simplified Zen Stove with a primer pan.
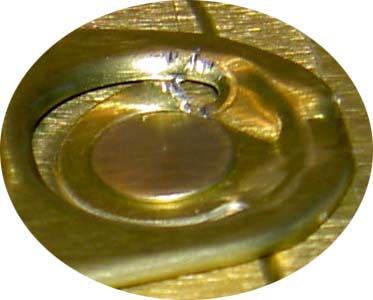
This step is completely unnecessary, but if you would like to remove the pull tab, you should do it first (to cut your losses if you end up breaking the seal). Use a sharp blade and carefully score or cut a notch in the pull tab where it wraps around the pivoting knob and then carefully grab that part with a pair of needle nose pliers and pull.

Remove the label and clean off any glue. If you like the silvery-metallic look, go to town with an SOS pad.
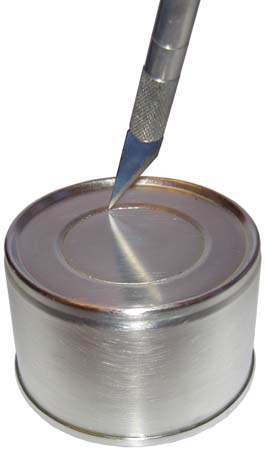
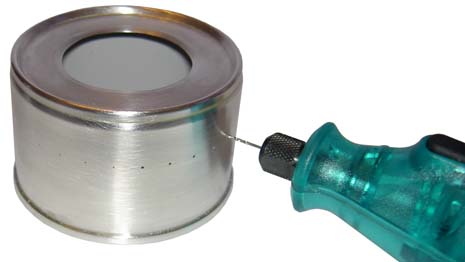
You will now need to cut out the fuel inlet port. A knife can be used to score around and around the edge of the center depression until it pops out.
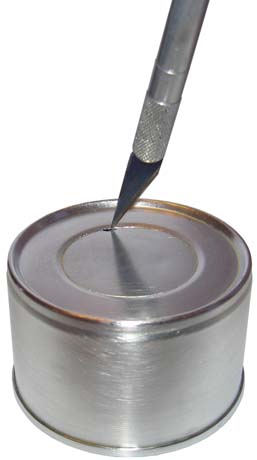
You can cheat a little by carefully starting a small 2mm-ish cut with the tip of your blade.
 →
→ 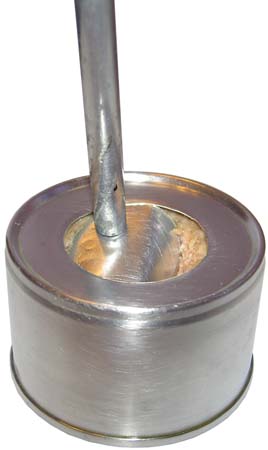
Once you get the cut/tear started, use the back of your knife handle or your thumb to tear along the score-line.
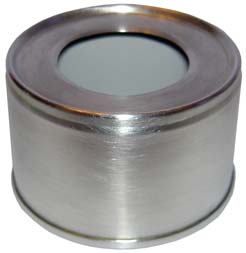
Empty out the contents of the can trough your new hole, smooth out the edge of your hole with and SOS pad, and wash out your can with soap and water.
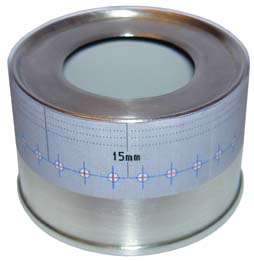
Cut out the Side-Burner template for Spam cans and tape it to the side of your can.
Note: Two templates are provided, one for needle sized holes (#71) and one for pushpin sized holes (#57).
The pushpin sized jets seem to be a bit more reliable than the smaller needle sized jets, especially for wet weather conditions or with poor quality fuel.
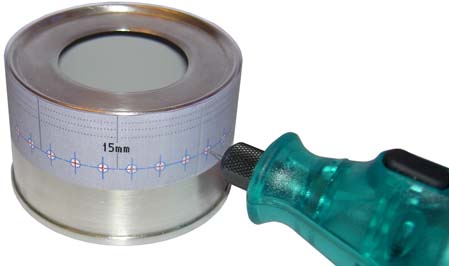
Use a #80 drill with a pin-vise or a Dremel to drill out the guide holes for the jets (or you can go straight to a #71 or #57drill if you aren't a perfectionist).
A number 8 needle can be substituted for the # 71 drill and a pushpin can be substituted for the #57drill.
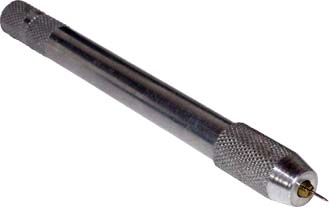
Pin-Vise
Use a #71 or # 57 drill to redrill the jet holes.
Clean off any burs that might be present and you're done. Just add a primer pan, an optional inner wall or both and you'll be ready to cook.
Inner Wall Conversion
Optionally you can add an inner wall to your Simplified Zen Stove, making it a Simple Zen Stove Plus. An inner wall will allow you to run the stove without a primer pan and keep it running if there is a poor seal between the pot and stove.
First cut out a flat sheet of aluminum from a 12oz drink can and tape it down to something hard and flat. If you like, you can use an SOS pad to remove any coloring on the outer side and the coating on the inner side of the sheet.

Cut out the Inner Wall template for Spam cans and completely tape it to your piece of aluminum sheet.
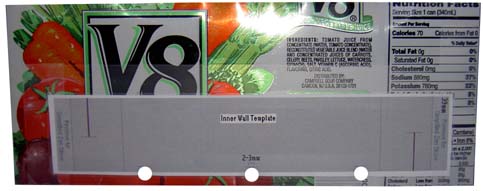
Punch out your three weep holes.
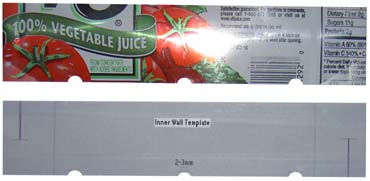
Cut out your inner wall, ensuring that you remove the outer half of the end tabs. For optimal results (the inner wall must be square for it to seal) cut the two slits prior to cutting the long sides.
Please make a note that this setup requires you to cut midway between the slits and the end of the template (see pre and post trimmed templates shown above).
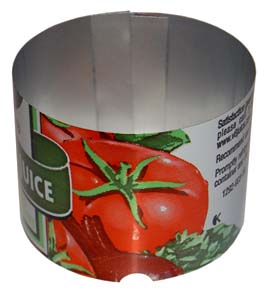
Hook the ends together, tabs facing in.
 →
→ 
Roll the end tabs of the inner wall inward and place it in your Simplified Zen Stove.
 →
→
Center the inner wall. If the inner wall is loose, you need to make a wider or neater inner wall and try it again.
NOTE: As the stove heats, cools and ages, the top will warp, causing the inner wall to loosen. To fix and help prevent this, simply run the side of a pen around the edge of the fuel inlet hole at about 45° (90° will widen the hole nicely but not force the top downwards) while applying moderate pressure down and outward to tighten things up a bit. If you like, you can even widen the fuel port opening by going around and around until the hole is as large as you would like it to be.
Optionally, you can use some JB Weld, High Temperature RTV or other similar adhesive (you may want to first sand the inside of the stove before placing the inner wall in it) to seal where the top of the inner wall comes in contact with the inside of the stove.
Fill with some alcohol and test.
Making the Primer Dish
The Simplified Zen Stove without an inner wall must have a primer pan in order to function. See Build a Primer Pan for instructions.
Even if you have an inner wall, a primer pan will make stove operation much easier.
Making the Pot
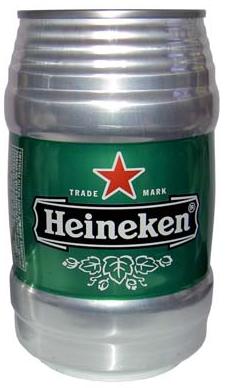
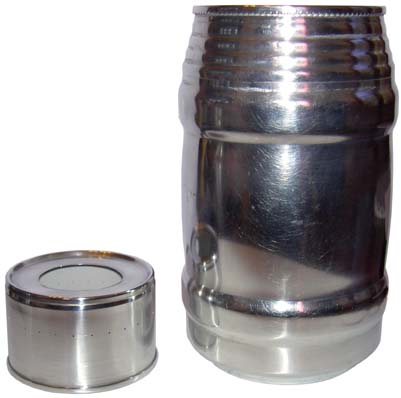
Heineken 24oz cans make very lightweight canpots if you are willing to hike with something that needs a lot of babying. This pot/stove combination is less than ideal, as much of the heat from the stoves will go up the side of the pot, but these stoves do fit nicely in the Heineken "pot" and make for a compact setup.
If you want the shiny silver look, use sandpaper or an SOS pad to remove any outer coating from the can before opening it. Once you get it nice and clean, empty the contents of the can.
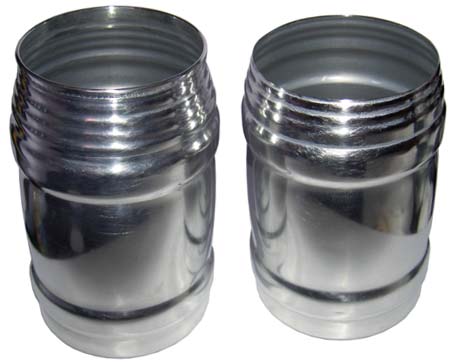
Either use a rotary can opener (note, some can openers will damage the can) to remove the top lid (left can-pot), or use a good pair of scissors to trim down to your desired height (right can-pot).
If you leave the rim intact (left can-pot), the pot will be more rigid and easier to lift when hot.
