|
|
|
|
Contact:
![zenseeker [at] hotmail [dot] com](EmailImage.gif)
With a little effort you can accessorize your pot and turn hiking passersby green with envy.
A pot cozy is a simple and elegant alternative to simmering that will dramatically save fuel
Materials
Insulation (one of the following)
3/8" closed cell foam from foam sleeping pad
light weight foil (or Mylar foil) backed insulation
fleece
Tape (one of the following)
Duct Tape. A bit heavier but much stronger and without burrs.
Regular aluminized flue tape (you don't need the 600°F stuff). This is lighter than duct tape but will more easily tear if applied to an area prone to ripping (lid hinge, some cozy baggies) and may create little burs that will scratch, snag or cut your pack, bag, clothes and/or skin).
Heavy duty Aluminum foil if you don't want your pot to stick to your foam pad.
Tools
Scissors
Marker
Tape measure
Instructions
The simplest of cozies are nit caps pulled over your pot but for those who want something more - the following pot cozy is basically made of some sort of insulation rolled into a tube with a circular top and bottom (which may or may not be removable), with aluminum foil added to the inside to prevent sticking.
Step 1 - Sides
Wrap your insulation around your pot and mark where the two ends will come together, making it loose enough to slide the pot, not forgetting the handles and lid, in and out. Determine the height of your pot with lid, add about 12mm (1/2inch) and mark that on your insulation. Trim your insulation down and if you weren't sure about your marks, you can cut your material long, test fit and trim as needed. FYI - Foam can be easily stretched (try to avoid overstretching) if your cozy is too tight. Use aluminized furnace tape or duct tape to tape your seam together.
Step 2 - Bottom
Slide the pot in your tube of insulation and set it on another piece of insulation. Draw a circle on your new piece (which will become your cozy bottom) around the boarder of your taped insulation. Cut.
If you aren't using Aluminum insulation, cut out a piece of foil about the same diameter as your bottom and tape it to what will be the inside bottom of your cozy. You may also want to line the inside of your tube with foil, carefully taping the edges. This will prevent a hot pot from sticking to your foam.
Place your bottom piece (with aluminum insulation facing inside if applicable) on the bottom side of your side tube and run a length of tape around the bottom of the tube of insulation, so that the side is securely taped and there a bit of overhang to fold over your bottom. If you like, you can cut slits every inch or so in your overhang to make the fold look better.
Step 3 - Top
Pull out your pot and set the top part of your top on yet another piece of insulation. Make sure that your tube is round (use your lid to shape it if needed) and mark the new piece of insulation (this will become your cozy top) around the inside circumference of your tube. Cut (add a little to your marked line to make your circle a tad bigger), test fit your top piece into the top opening of your tube and trim as needed. Snug is good.
Step 4 - Optional Finishing Touches
Make a pull tab
stick a piece of tape on the edge of your cozy lid
fold it over on itself to make a tab
wrap the remainder of your tape under the lid.
Make a hinge
on your lid, tape the side opposite to your pull tab (if you have one) to the cozy tube and add another piece of tape on the inside of your cozy if you like
Cozy Baggy
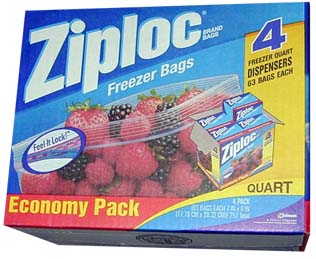
Freezer Bags
Using the same technique above, you can make a cozy baggy to hold zip locked bags of dehydrated food. Freezer Bags are more durable than regular other Ziploc bags and work great for lightweight food storage and as bowls to eat out of.
Cozy baggy for zip locked meals
Options -
if you used foil tape, you may want to reinforce high stress areas by adding some duct tape, a few stitches or grommets to prevent future tears
if you get fancy and place your seams somewhere other than the sides, which are high tear areas, you can get away with tear free foil tape jobs
fold lid in cozy to keep shut
sew or glue on velcro to hold lid down
sew a button on the front and back and use a piece of string tied to one button to wrap around the other to secure cozy closed
tie a string around cozy
use a piece of holiday elastic cord (or regular elastic) tied in a loop and use it just like it was a big rubber band (shown above). You can also sew it to your cozy or tie it to a button sewn on your cozy.
Featherweight Pot Lids
Use aluminum flashing, an aluminum oven liner or heavy duty foil to make a feather weight pot lid.
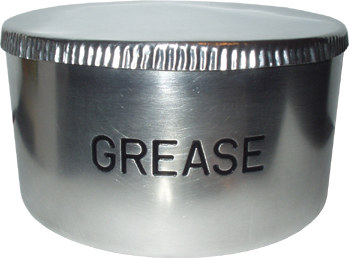
"Grease Pot" with lid made from aluminum flashing
Aluminum flashing makes a pretty decent lid. It is sturdy enough for long term use and weighs generally around a half an ounce, depending on the diameter of pot. To shape the lid, you may want to use a crimper to aid in rolling the edge of your lid down and around your pot. If you don't have a crimper, one can be made from 1/16th inch by 1inch flat bar aluminum with scissors, a file, drill and rivets. See the templates page for a tool template.
If you want to go even lighter, you can use a disposable oven liner or heavy duty foil to make a lid.
Crimper Tool Side
Crimper Tool Front View
Also see:
Black Paint
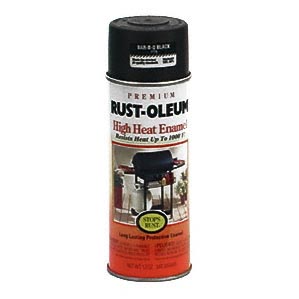
Painting your pot black, or even just leaving on blacking from long term camp use, will increase the heat conduction of your pot and should decrease the amount of fuel needed to cook. Some paints will bubble and/burn from the flames and/or alcohol vapors. Rust-Oleum BBQ black paint seems to work fine.
Heat Exchangers

9oz MSR Heat exchanger
If you are crafty, you can build heat exchangers for the bottom, sides, and/or even inside of your pot. Heat exchangers allow more of the heat from your stove to actually heat your pot and contents instead of just going up into the atmosphere. The Jetboil system has a decent Fluxring heat exchanger on the bottom of its integrated pot that's worth inspection if you are considering building an underside exchanger.

4oz BakePacker Ultra-Light
Heat exchangers on the inside of pots can be used to heat up water faster and more efficiently and as ovens where the exchanger transfers heat to food in a plastic bag or aluminum wrap.
Homemade bake adapters can be quite easy to construct and operate. See Bruce's Accessories, Tinny's Baking Biscuits and the Brasslite TrailBaker for other ideas.
Handling and Lifting Pots
There are many ways to grab and move a hot pot. If your pot has handles then grabbing it with a fabric pot holder, or just a couple of layers of cloth, should do the trick (unless the handles are engulfed in flames). Fabric pot grabbers can be easily made or trimmed down from larger ones and can be used to keep your stove from clanging around in your pot while hiking.

MSR 1.0oz Pot Gripper
If you don't have built in handles, you can try a commercial pot griper. MSR makes a 1.0oz gripper that works pretty well.

Honeycombed MSR Grippers
Minimal weight (0.3oz/10g) can be shaved off MSR 1.0 grippers by honeycombing (drilling holes) and removing the plastic handle. But if you would like to save more weight, you can custom build a gripper with thinner material, such as 1/16" flat aluminum.
Homemade grippers can also be made from plumbers tape or 1/16th" x 1" flat aluminum. Depending on how you design them, they generally work best with pots that have a prominent rolled lip (such as the Antigravity 3 Cup Pot). Also see backpackinglight.com 2365
Can-Pot Handling
If you are using a Can-Pot that requires a more delicate approach to lifting, wait for the flames to die down, and use a piece of closed cell foam (such as from a cheap sleep pad) or cloth folded over a couple of times and grab the side of the Can-Pot when hot. If you can't get a good grip with one hand because you have small hands or arthritis, try using two hands.
Note - Heineken Can-Pots are much easier to grab since they aren't flimsy and have ridges to help you grip them.
There are also several ways to make a working pot handle/gripper if you don't mind the extra weight:
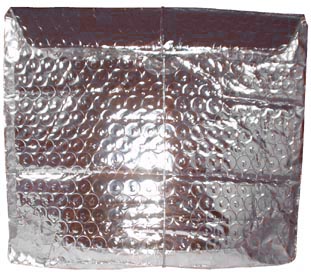
You can just use a bit of aluminum bubble wrap or closed cell foam to hold the hot pot with one or two hands, but expect the bubbles to slowly pop if you grip too hard around a hot pot.
A nice gripper can made from a 4cm wide (wider for comfort and protection) length of closed cell foam covered in heavy duty aluminum foil or foil tape and taped with foil tape to form a ring (first roll the aluminum covered foam around a small cylinder to round/shape the inside foil before taping closed) that slides over the top of the Can-Pot. Simply wait for the stove to run out of fuel then slip the ring over the top of your pot and down around the mid point of the pot and grab.
If you use a pot cozy, you can make one with a removable bottom and slip it onto your pot after the stove runs out of fuel and use it as a gripper. The cozy can also add a level of protection to your pot during transport.
Wrap a 6cm x 43cm piece of closed cell foam (like that from cheap sleeping pad) or aluminum foil bubble wrap (optimum size depends on the rigidity and make up of your material which differs) around the pot like this
and grasp the free ends together to put pressure around the pot. This works surprisingly well, even without a layer of foil or flue tape over foam (which would increase its lifespan as it will slowly melt over time), and weighs very little. The downside is that you must wait for the stove to run out of fuel before attempting to lift the pot, or it will melt. To save on weight, you can trim down your material to as small as still comfortable/usable. A strip of foil tape around the outside adds rigidity and prevent stretching of foil.
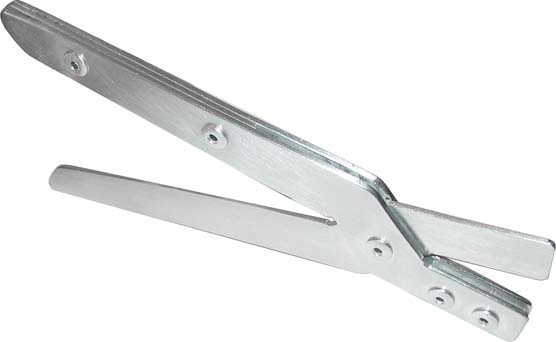
You can use a piece of coat hanger, stainless wire, plumbers tape (the metal tape with holes in it), or a strip of aluminum shaped like this
to grab your pot (minimal pressure is needed in a Heineken can if you grab it just under the first ridge above the centerline of the Can-Pot) This will weigh about 1/2oz. If you are using flat metal strips drill out holes in your handle to make it lighter and if you are using a Heineken can as a pot, you may want to angle the sides in to help grab under the ridges.
Aluminum foil folded over several times, for strength, does a good job of grabbing a boiling pot but is too hot to hold without several layers of fabric or gloves (which makes this technique just about useless).
If you cut your lid out with a knife and leave the rim, you can form a piece of coat hanger (or stainless steel wire of similar gauge) to hook inside the top rim (like a handle on a pail or bucket).
Drill holes in the top rim and run some stainless steel wire through it to make a handle.
Handles made from wire or strips of metal can be secured to the ridges of a Heineken can with aluminum or stainless wire wrapped around the pot.
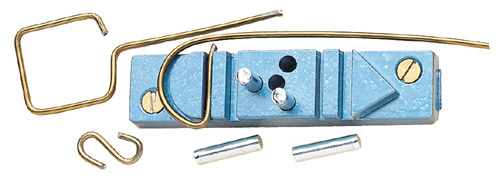
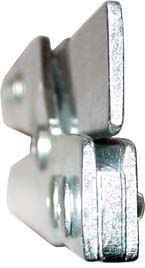
Mike Kollross Handles for CanPots
Image1
This link shows the needed tools and the progression of altering the shower curtain rings. The fifth step is an alteration of step 3 to form the handles by twisting the eyes 90 degrees. The tool in the upper right is a wire bending jig available from LeeValley Tools.
The original setup was for two handles placed opposite of each other but a single handle works as well.