|
|
|
|
Contact:
![zenseeker [at] hotmail [dot] com](EmailImage.gif)
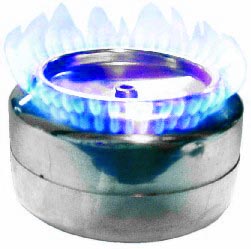
Pressurized alcohol stoves work by vaporizing and pressurizing alcohol inside the stove so that it is forced out through small jets. They typically burn very hot, and boil faster than other designs and carry the possibility of being more fuel efficient with better air-fuel mixture since vapor release and patterns be controlled to some extent. And since the system is sealed off, you might be able to adjust flame distribution and heat output by tuning in the number and size of jets and where they are focused (center of pot to wide dispersion).
Advantages -
Completely sealed - allowing for faster fire-ups.
No wasted fuel from open center fuel port.
Potential of being more fuel efficient than other alcohol stove designs.
Wide range of set flame coverage from pinpoint to wide to sideburner to even wider.
Wide range of set heat output from minimal (less holes) to extremely hot (many small jets).
Works if designed correctly.
Drawbacks -
Must be primed so a primer pan, primer wick or other priming method is needed.
Difficult to construct.
May blow apart if you fail to replace screw before lighting (depending on setup).
Can vaporize pot stand if designed for extreme heat output and over primed.
Screw for fuel hole can be lost.
May burn too hot to efficiently heat water, depending on design.
Requires a pot stand (unless made into a sideburner).
Difficult to simmer (depending on design).
Note - This is just one of the many types of DIY alcohol stove options. For more information on different options visit Zen and the Art of the Alcohol Stove and the Templates page.
Vargo Triad Titanium Alcohol/Fuel Tab Stove
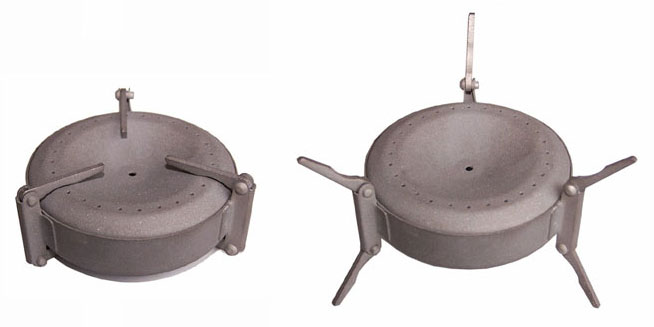
The Vargo Triad is a commercially available pressurized alcohol stove and has a built in pot stand. Weighing in at just over an ounce, it is compact and works but can be difficult to prime.
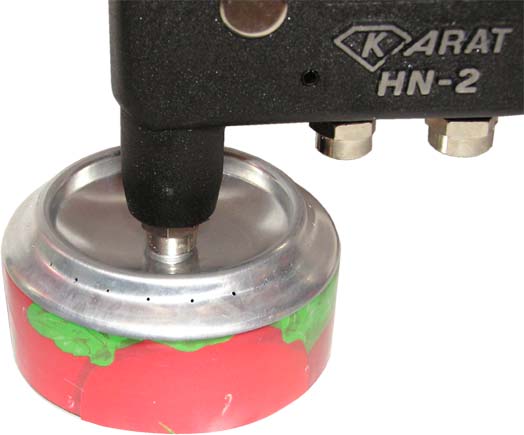
This homemade sealed high performance alcohol stove (similar to Don Johnson's Photon Stove - New Link) burns denatured alcohol (ethanol), HEET (methanol) and similar fuels. It requires a pot stand (or rocks) to hold the pot about 1-1.5inches for the top of stove and a primer pan to heat up the stove to operating temperatures. Simmering can be difficult since dropping the operating temperature below a certain point will extinguish the stove.
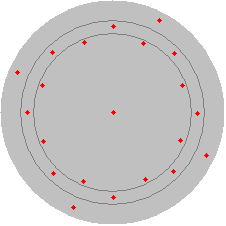
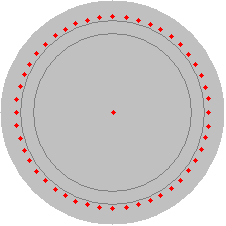
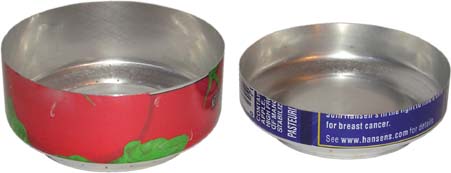
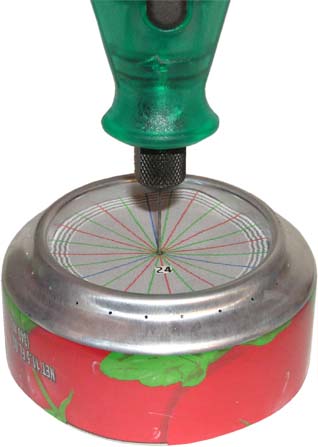
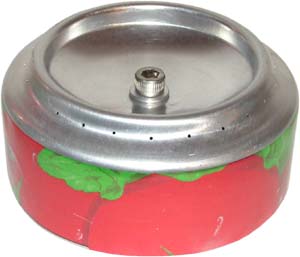
The stove shown above is made from two 12oz pop can bottoms. Twenty jets were drilled in the pattern shown below (which is worth making just to see the mesmerizing flame pattern) per Don Johnson's design. In this example, a #74 drill (about needle size) was used to make the small jets. A threaded #8 aluminum rivet and #8 aluminum screw were used to seal the fuel port. The bottom section of the stove is 15mm tall in the photo, but anything between 15-30 would be fine. The top piece is about 30mm tall. And inner cylinder wall was not used in this stove as it would interfere with the jet pattern used in this stove.
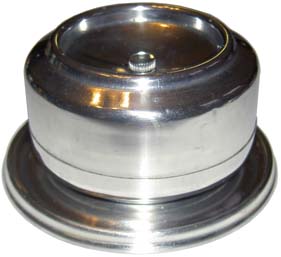
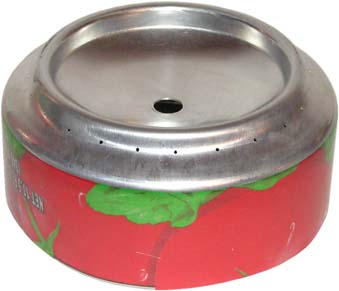
There are many different ways to set up the jet pattern for this stove. A simpler jet pattern such as jets drilled along the outer base of the center rim or on the side of the can also be used. The stove shown below has 48 jets drilled with a #80 drill (very tiny hole) and burns very hot. As a note to experimenting with different configurations - stoves with some jet configurations can be over primed and cause a dangerous overheating condition which can burn and vaporize an aluminum pot stand and windscreen almost instantly. This is fun to watch when tweaking and experimenting, but is dangerous disappointing if this happens on the trail.
Minibull Design had several versions for sale including and an interesting SST worthy of further investigation.
NOTE - if you don't replace the center screw which allows you to fill your stove prior to lighting it, there is a chance your stove will blow apart when primed if vapors inside the stove are ignited from a large open filler hole.
Construction
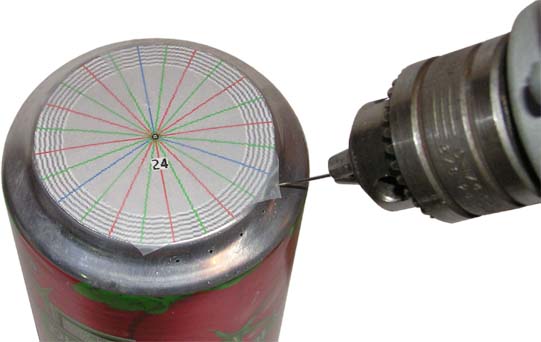
Use a sewing pin (shown - a pin designed for holding fabric together and not a pin designed for use as a thumb tack) or #8 Sewing needle in an electric drill to drill out 24 evenly spaced jets around the ridge of your 30mm tall can section.
A template taped to the top of your can section may be used to help you evenly space jets.
Alternately you can use a #80 drill for a guide hole followed by a #74 drill for cleaner jets.
Note: Wear eye protection when using a drill in this manner as these small pins and machine drills can shatter while drilling.
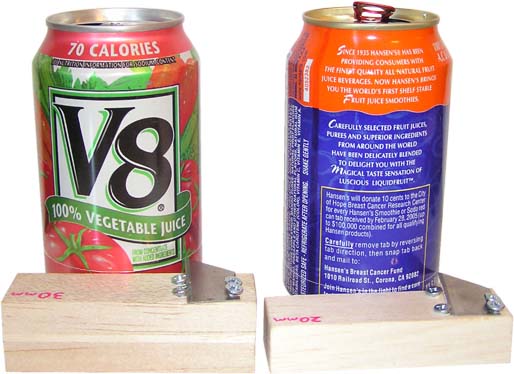
Mark a circumferential line 30mm from the bottom of the can you are working on and 20mm from the bottom of a second empty can.
Use scissors and trim down to your circumferential marks.
Polishing the edges with an SOS pad will aid in assembly and decrease the chance of skin lacerations later on.
Drill a hole centered in the bottom of your 30mm section.
Use a drill bit, round file, or unibit to make a 7/32" hole.
Clean off any burs with a round file or some sandpaper.
This will be your fuel port. It can be covered with a coin, pebble, nail, etc. to increase pressure in your stove.
There are many of Options for sealing your fuel port.
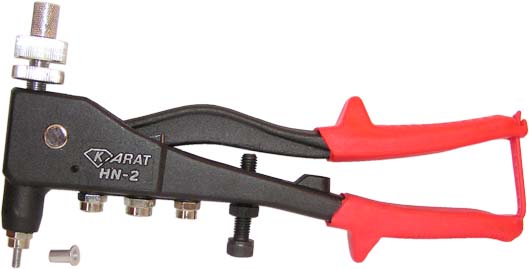
A threaded rivet tool can be used to place a treaded rivet in your fuel port.
A threaded rivet adds a nice finished look to your stove and allows for a good seal.
If you are using aluminum rivets, avoid the temptation to squeeze too hard - otherwise you will end up distorting your threads.
Test fit your screw. If you damaged your threads, use a tap or steel screw to retap your threads or drill out your rivet and start over.
↓ ↓
↓
Press a Dilator Tool into your 20mm bottom section. This should enlarge your 20mm section so that it can slip over your 30mmm section.
Perform a test fit to ensure the 20mm section can slide over the 30mm section. If it doesn't, repeat using the Dilator Tool until it does.
Note: an unopened can of the same size as your can section to be stretched may be used in lieu of a Dilator Tool, but you may need to really work it by repeatedly pressing it into the bottom section at less than perpendicular angles. You are more likely to buckle the sidewall of the top section during assembly if you choose to just use an unaltered unopened can as a dilator.
Smear some high temperature RTV silicone or JB Weld on the inner wall of your 20mm section.
Note - It is important to have a good bond between your two can sections since this stove builds up pressure during operations and may reach high pressures if over primed. Make sure there is plenty of overlap with your two can sections and that they fit together as snuggly as possible. You may want to also consider using JB Weld in lieu of RTV silicone since it has greater bonding strength.
Note: Using an inner wall is entirely optional. If you use one, it will give you a solid and level end point when pressing the top and bottom sections together.
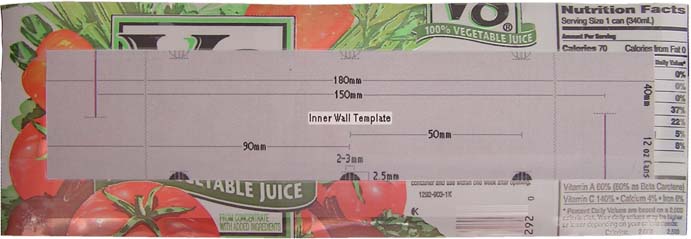
To make an inner wall, first print out a 40mm inner wall template and tape it to a section from the side of a beverage can (12oz V8 can sidewall shown).
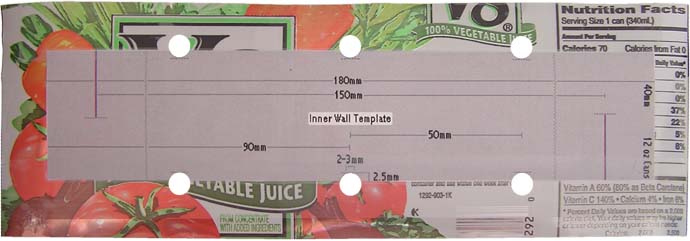
Use a hole punch to punch out both bottom and top weep holes.
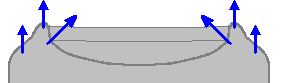
The top weep holes shown here are important in pressurized stoves as they prevent unbalanced over-pressurization in the central chamber which can lead to ejection of liquid fuel through your jets.

Cut your side slits, trim your inner wall, and lock the slits together to form a cylinder as shown above.
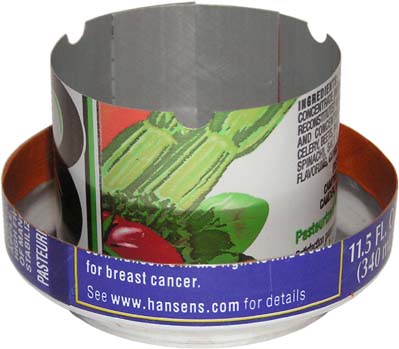
If you are using an inner wall, set it in your 20mm section.
Carefully fit your 30mm section into your 20mm section.
You may need to use a shim (shown above) to get it to fit. Just take your time to avoid damaging your stove.
To make a shim, cut out a section of aluminum from a beverage can, round off edges with scissors and polish these edges smooth with an SOS pad and/or metal polish. Smooth edges are important if you wish to avoid damaging your can sections.

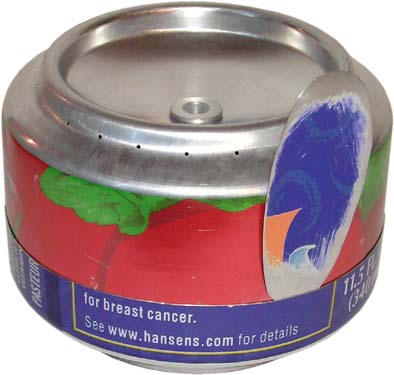
Press it all together.
If you opt to forgo using an inner wall, carefully press the two section together so that there is some overlap and everything looks even. If you meet resistance - stop (or the sides of the top section will buckle and create an unsightly leak).
If you are using an inner wall then firmly press the top and bottom sections together and set a heavy book on it overnight.
Let the silicone vulcanize overnight before testing your stove.
You will need a Primer Pan, primer wick or other priming method to operate your stove.
